GMC-4 microcomputer
Following a recommendation from Serge Vakulenko I have purchased GMC-4 in a funny Japanese gadget stop, Japan Trend Shop. To be honest, there is unique charm in such devices.
GMC-4 is a 4-bit microcomputer:
- 4-bit word
- 8 register, 1 flag
- 80 words in program memory
- 16 words in data memory
- 7 pre-loaded program (Organ, Sound Hit Game, Whack-a-mole, Tennis, Timer, Music Player, Morse Code Generator)
- 7 regular 2-pin LEDs
- one 7-segment LED
- a hex keypad
- a speaker
- hard reset button
- powered from three AA elements
The architecture is described in one small document – Programming the Gakken GMC-4 Microcomputer.
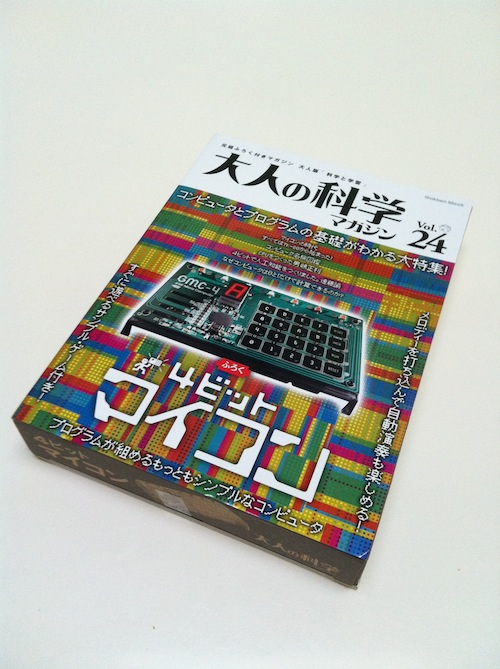
Yesterday my order arrived. GMC-4 is an add-on to an issue of a Japanese magazine called “Gakken”, #24, 2009. Unfortunately it’s all in Japanese language.
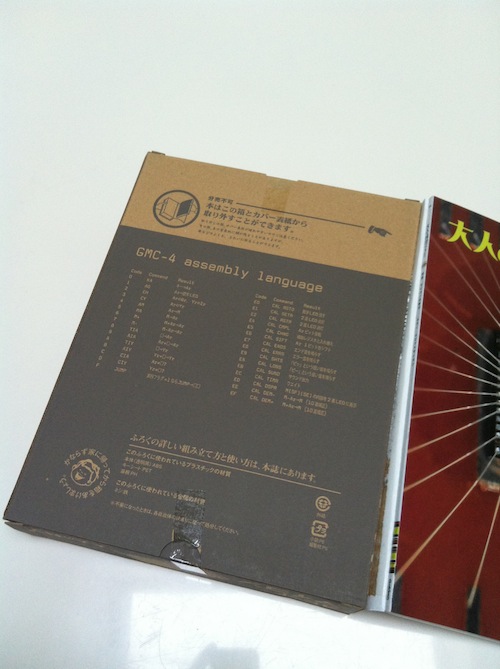
Funny that the back side of the box has a table of all GMC-4 instructions.
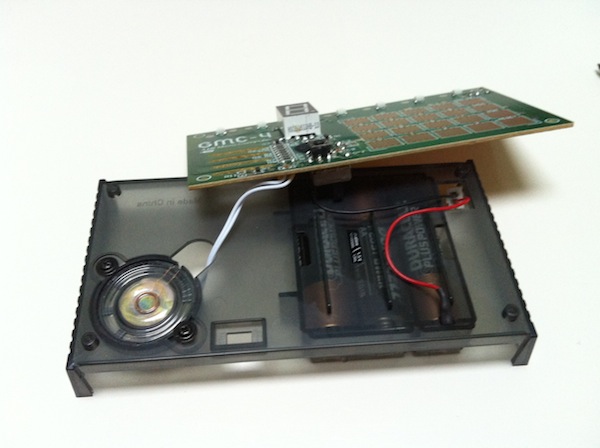
The board, speaker, case, parts of the keyboard.
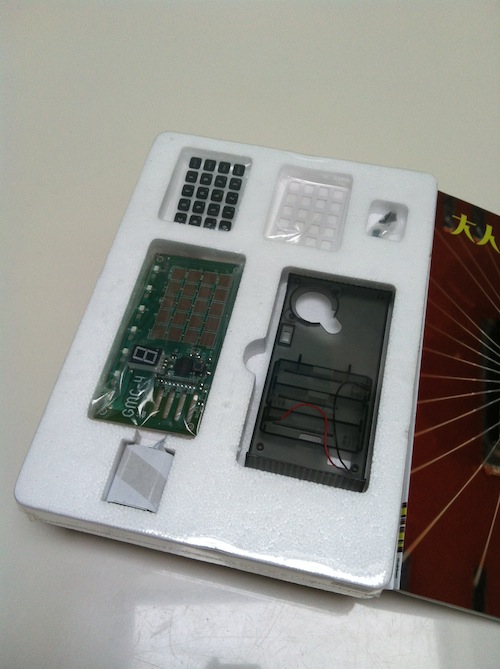
The manual in Japanese is though.
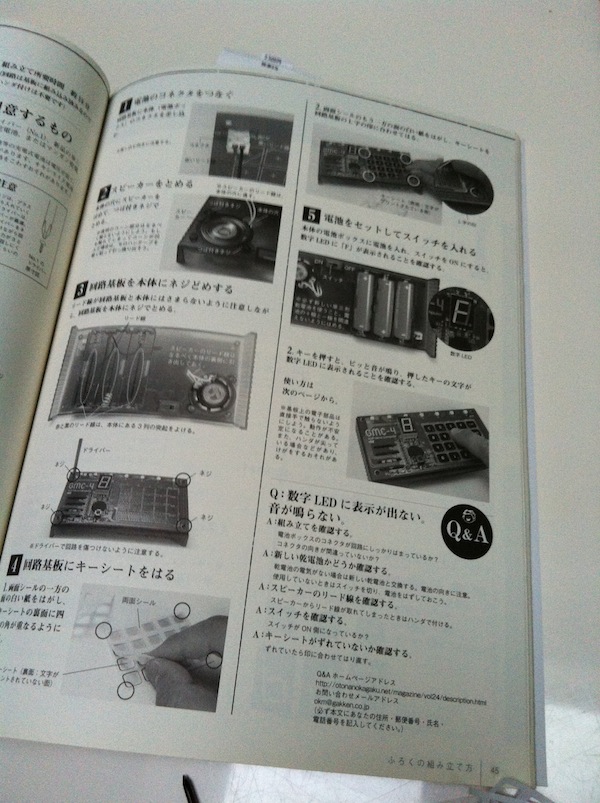
Set up batteries and the speaker.

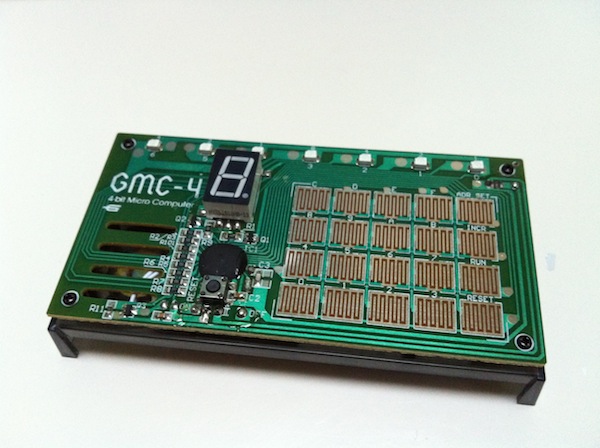
The board.
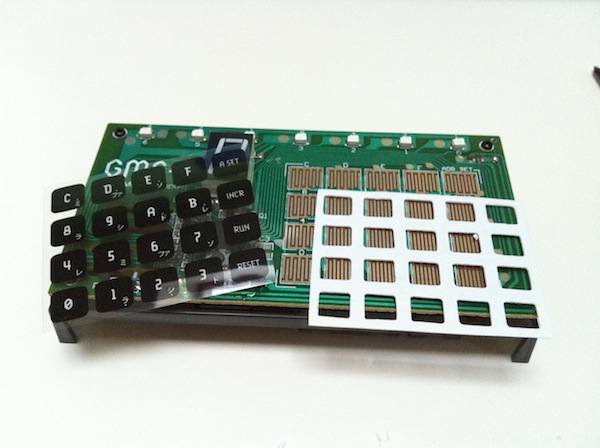
Sticking the keyboard.
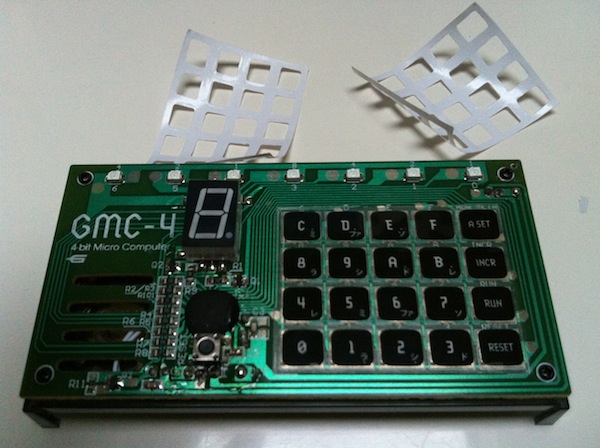
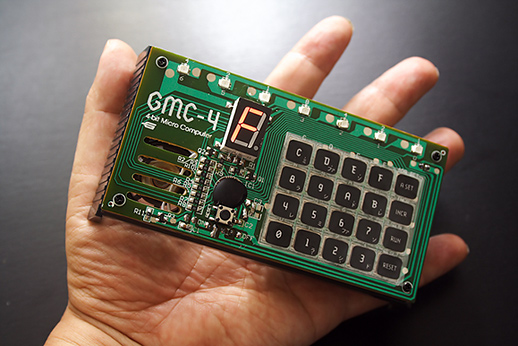
Power on… It’s alive! Alive!!!
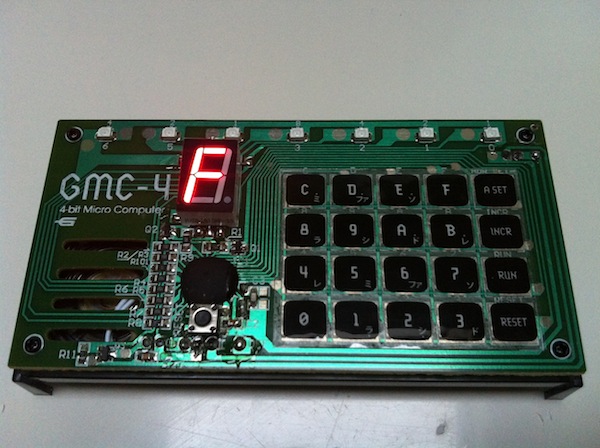
There is the keyboard, the 7-segment LED, the processor below it, then the “hard reset” button. There are seven independent LEDS on the top. They are used, for instance, to display the current address.
Let’s write something. For example, a program waiting for a key pressed and then displaying it on the 7-segment readout.
00: 0     KA 0       ; Read a key code (0-F) into A. If pressed, then Flag=0, else Flag=1.
01: F00   JUMP 00    ; If Flag=1 (not pressed), then go to 00.
04: 1     AO         ; Out A to 7-segment readout and set Flag=1
05: F00   JUMP 00    ; If Flag=1 (it is always 1 here), then jump to 00.
To enter the code: RESET 0 INCR F INCR 0 INCR 0 INCR 1 INCR F INCR 0 INCR 0 INCR RESET
To run: RESET 1 RUN
Interestingly, this device allows step-by-step trace. If to run the program via RESET 6 RUN, it will be stopping after each instruction and displaying the current address on the top LEDs in binary code. To continue, we need to press INCR and so on. By pressing RESET we can interrupt the program and check out the registers (they are regular cells in memory). This is simple but convenient debugging.
Now slightly more complex example: a running light over the top LEDs displaying the number of the current one on the 7-segment readout.
00: 80    TIA 0     ; A=0
02: 1     AO        ; Out A to 7-segment readout.
03: 3     CY        ; Store A to Y.
04: E1    CAL SETR  ; Turn on an LED which number is in Y.
06: 84    TIA 4     ; A=4
08: EC    CAL TMR   ; Wait (A+1)*0.1 seconds (0.5s).
0A: E2    CAL RSTR  ; Turn off an LED which number is in Y.
0C: 3     CY        ; Restore A from Y.
0D: 91    AIA 1     ; A = A + 1
0F: C7    CIA 7     ; If A=7, then Flag=0. Otherwise Flag=1.
11: F02   JUMP 02   ; Go to 02, if Flag=1, and set Flag=1.
13: F00   JUMP 00   ; Unconditional jump to 00 (Flag=1 after the previous instruction).
Code: 8 0 1 3 E 1 8 4 E C E 2 3 9 1 C 7 F 0 2 F 0 0
Development tools
Everything is in Japanese, but Google Translate does an amazing job.
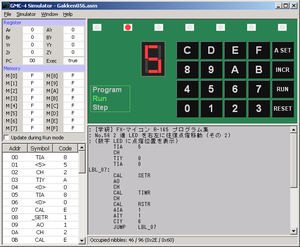
Simulator
The loader
Programming languages
Wrap up
This is an amazing gadget. I started programming on Radio-86RK in machine code typing in the Monitor. Same here. Also, the issue of the magazine, which GMC-4 is bundled with, according to illustrations (unfortunately, I don’t read Japanese), is dedicated to the history of microprocessors starting from Intel 4004. Then there is a dozen of code examples and projects using GMC-4. Beautiful!
Disclaimer